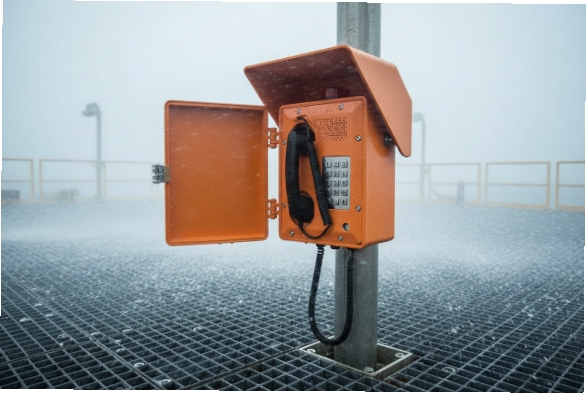
Outdoor handsets 1 fail when water finds a tiny path. Then audio drops, corrosion starts, and users lose trust in the whole emergency point.
A properly sealed handset uses layered barriers: internal capsule gaskets, a controlled cord entry seal, breathable acoustic elements, and the right adhesives that stay flexible after years of weather and cleaning.

A sealing mindset that works: treat the handset as an enclosure with moving parts
A handset is not a simple shell. It is an acoustic device 2 with multiple openings, pressure changes, and constant handling. Water rarely enters through the big seam alone. It usually enters through a weak interface that moves or flexes. That is why the best approach is a two-barrier design: an outer mechanical seal that blocks direct ingress, and an inner protection layer that keeps the sensitive capsule and wiring dry even if the outer layer sees moisture.
Map the real leak paths before choosing parts
Most handset leaks come from five places:
1) Receiver and microphone grill area (water pressure + capillary action 3 through sound paths)
2) Housing seam (uneven screw torque or warped halves)
3) Cord entry (gland weakness, no strain relief, water running down the cord)
4) Capsule seat (no gasket, wrong compression, gasket creep)
5) Handling damage (drop impact that creates micro-cracks or shifts compression)
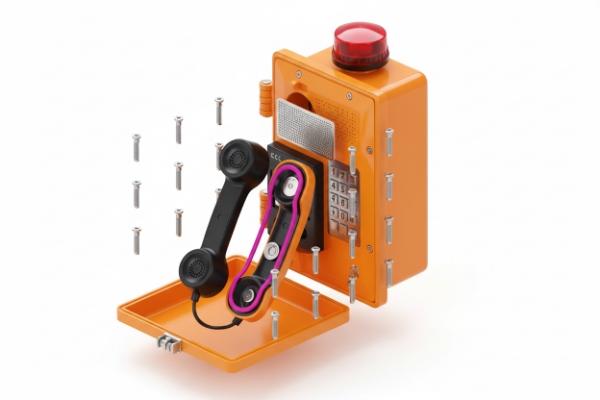
Build a “stack” instead of relying on one seal
A strong handset usually uses:
-
A perimeter gasket between housing halves (or an overmolded seam)
-
Molded gaskets that seat each capsule (receiver + mic) into a defined pocket
-
An acoustic membrane that blocks water while letting sound pass
-
A cord boot + gland + strain relief so water cannot follow the cord inside
-
A pressure equalization path (vent membrane) so the handset does not “breathe” through the grills or seam
A quick checklist for your drawing review
| Handset area | What to specify | What it prevents |
|---|---|---|
| Capsule pockets | Defined gasket land + compression target | Water tracking behind capsules |
| Grill openings | Hydrophobic acoustic membrane + bonding method | Direct splash and jet ingress |
| Housing seam | Continuous gasket + torque pattern | Corner leaks and seam wicking |
| Cord entry | Boot + gland + strain relief + drip plan | Capillary leaks along cord |
| Pressure control | Vent membrane placed away from jets | Pumping moisture through weak points |
If the handset is sealed like a system, IP performance becomes repeatable. It also keeps acoustic tuning stable over time.
The next step is deciding how much sealing belongs inside the receiver capsule area, because that is where most “mystery leaks” start.
Do I need molded gaskets inside the receiver capsule?
A handset can have a perfect outer seam and still leak into the receiver cavity. That moisture then kills the speaker, and the call becomes faint or distorted.
Yes, molded gaskets inside the receiver and microphone capsule pockets are often the most reliable way to stop hidden leaks and protect audio parts, especially for IP65–IP67 handset targets.
Why capsule gaskets matter more than many teams expect
The receiver and mic areas are “designed openings.” They must pass sound, so they are natural water attack points. Even with an acoustic membrane 4, water can still migrate around the membrane edge if the capsule seat is not sealed. A molded gasket gives you a controlled, repeatable barrier that can tolerate small variation in capsule height and housing flatness.
When a molded gasket is the right call
A molded gasket inside the capsule pocket makes sense when:
-
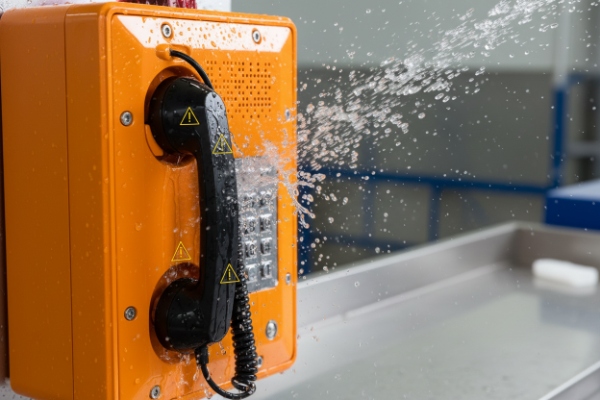
The handset must survive heavy rain, hose rinse, or coastal mist
-
The handset is used in public areas where it gets cleaned often
-
The design uses replaceable capsules and you want serviceable sealing
-
You need stable acoustic volume because water intrusion changes back volume
A flat die-cut gasket can work, but it is more sensitive to compression variation and assembly handling. Molded gaskets 5 usually locate better and keep shape over time.
Design notes that improve sealing without hurting sound
-
Use a gasket geometry that seals around the capsule rim, not across the sound path.
-
Control compression with hard stops so screws do not crush the gasket unevenly.
-
Avoid sharp plastic edges that can cut the gasket during assembly.
-
Keep the gasket material stable in your environment (UV, salt, oils, cleaners).
| Capsule sealing choice | Best use case | Risk to manage |
|---|---|---|
| Molded gasket in pocket | High IP handsets, long life | Tooling cost, tolerance control |
| Die-cut flat gasket | Mid IP, cost-sensitive | Compression variation, creep |
| Adhesive-only seating | Prototype only | Unrepeatable, hard to service |
For most outdoor handsets, molded gaskets inside receiver and mic pockets reduce failure rates more than any single change.
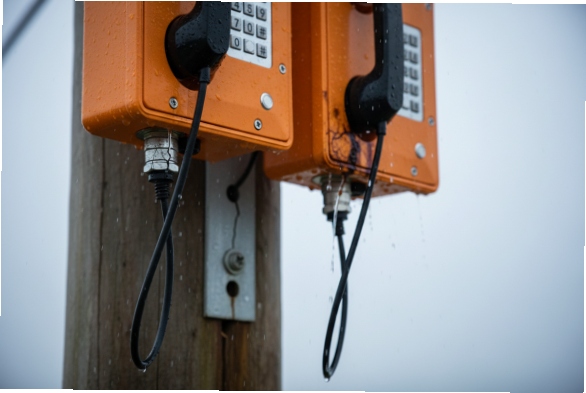
Now, even the best capsule sealing can be defeated by the cord entry. Water loves to run down a curly cord and find the first opening.
How do I route my curly cord to prevent leaks?
Many handset leaks are not “rain leaks.” They are “cord leaks.” Water follows the coil, reaches the entry, then wicks inside like a straw.
Route the curly cord with a drip strategy, use a double seal at the entry (boot + gland), and add strain relief so movement never works the seal loose over time.
Treat the cord as a water delivery system
A curly cord 6 catches water and holds it. Then gravity moves it toward the handset entry. If the entry has a small gap, capillary action can pull water inside even without pressure jets.
Practical routing and entry design that holds up outdoors
-
Downward exit orientation: If possible, route the cord so it exits downward from the handset. This reduces pooling at the entry.
-
Drip loop concept: Create a low point before the entry so water drips off instead of running into the opening.
-
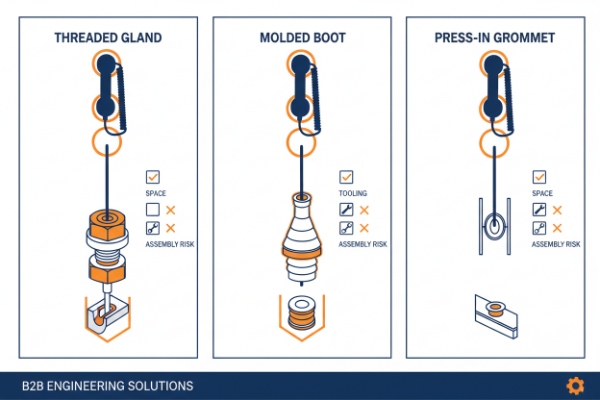
Boot + gland pairing: A soft boot blocks splash and protects bending. A gland provides the real seal against the housing.
-
Strain relief inside the handset: Use a clamp or tie point so pulling on the cord never loads the gland seal line.
-
Avoid straight “tunnel” entries: A straight bore can act like a funnel. A stepped entry with a sealing land is safer.
Stop capillary action inside the cord jacket
Even when the outer entry is sealed, water can migrate along fibers or voids in the cable jacket if the cable construction allows it. For outdoor handsets:
-
Choose a cord with a tight jacket and low water absorption.
-
Consider a filled or water-blocking cable construction if the site is harsh.
-
Potting the cable end inside the handset can block wicking, but it must be done carefully to avoid stressing wires.
| Cord entry feature | What it does | Common mistake |
|---|---|---|
| External boot | Splash shield + bend protection | Treating boot as the only seal |
| Cable gland 7 | Primary IP barrier | Wrong gland size for jacket OD |
| Internal strain relief | Stops seal fatigue | Letting cord pull directly on seal |
| Drip routing | Reduces water feed | Routing cord upward into the entry |
| Optional potting | Blocks internal wicking | Potting without service plan |
Cord routing is usually the cheapest place to win reliability. It also prevents “random” failures that show up only after storms.
Next is acoustic performance. Many outdoor projects want loud, clear audio without big grill openings. That is where vent membranes come in.
Should I add Gore vents for my acoustic performance targets?
Some teams add vents to fix muffled audio. Other teams avoid vents because they fear leaks. Both teams can be right, depending on placement and purpose.
A breathable ePTFE vent membrane (often called a Gore-type vent) can help pressure equalization and reduce condensation while protecting IP, but it must be placed and protected so jets and pooling water do not attack it directly.
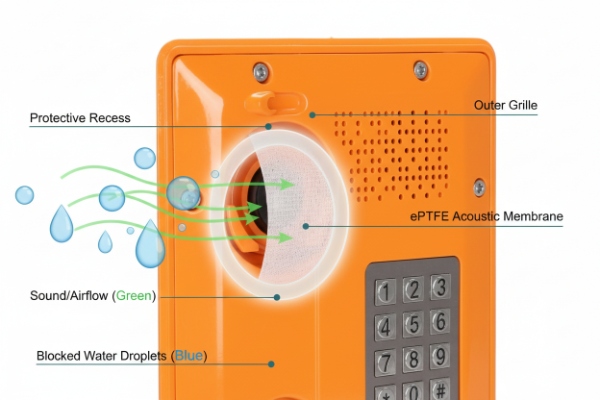
Separate two different needs: acoustic barrier vs pressure vent
-
An acoustic membrane sits over the mic/speaker opening. It blocks water while letting sound pass.
-
A vent membrane equalizes pressure between inside and outside. It reduces “pumping” through weak seals during temperature swings.
A handset often benefits from both. If the handset has no vent path, it can breathe through the grills or seam. That can pull moisture in over time and can create fogging.
When adding a vent is worth it
Add a vent membrane when:
-
The handset faces strong thermal cycling (sun/rain, hot/cold days)
-
Condensation has shown up in field units
-
The housing is very tight and pressure changes are stressing seals
-
You need more stable acoustic behavior across pressure changes
How to add vents without creating a new failure point
-
Place the vent away from direct spray and away from the lowest point where water pools.
-
Add a small hood or labyrinth feature to block direct jet impact.
-
Keep the vent opening small but sufficient for pressure equalization.
-
Verify chemical exposure. Some cleaners and oils can foul membranes.
| Vent decision | Benefit | Risk | Control |
|---|---|---|---|
| Add vent membrane | Less pumping, less condensation | Clogging, jet attack | Protected placement + hood |
| No vent | Fewer components | Pressure stress on seams | Stronger gasket + process control |
| Over-venting | Faster equalization | Easier water path if mislocated | Use only what you need |
A vent is not a magic part. It is a controlled path for air. If it is placed well, it reduces leak risk. If it is placed poorly, it becomes the first point of ingress.
Finally, even with perfect geometry, sealing depends on chemistry. Adhesives and potting compounds can save a design or destroy serviceability.
What adhesives or potting compounds should I specify?
The wrong adhesive can crack in cold weather or soften under oil. The wrong potting can trap stress and cause wire breaks. A good spec keeps seals flexible and repeatable.
Specify flexible, electronics-safe sealants for seams and membranes, and use potting only where it adds real value, like cord entry blocking and strain relief. Prefer neutral-cure RTV silicone or polyurethane where flexibility matters, and use epoxy only when rigidity is acceptable.

Break the adhesive job into clear use cases
1) Bonding an acoustic membrane to the housing
You need consistent adhesion, no edge lift, and stable performance after humidity and cleaning.
2) Sealing a seam or secondary barrier
You want flexibility, good adhesion to plastics/metals, and long-term stability.
3) Potting the cord entry inside the handset
You want water blocking and strain relief 8 without wicking or cracking.
4) Protecting a small PCB inside the handset
You want moisture resistance without heat damage or rework disaster.
Practical compound guidance that fits outdoor handsets
-
Neutral-cure RTV silicone: Good flexibility and weather stability. It suits seam sealing and membrane bonding. It also handles temperature swings well.
-
Polyurethane potting/sealants: Good toughness and adhesion. It suits cord entry potting when you want stronger mechanical support.
-
Epoxy potting: Very strong and rigid. It suits harsh environments when rework is not needed. It can stress wires and plastics under thermal cycling, so it needs care.
-
MS polymer / hybrid sealants: Useful for seams in some builds, but compatibility and process control should be confirmed.
Specify process controls, not only the brand name
-
Surface prep: clean, dry, and consistent.
-
Primer: used when needed for low-energy plastics.
-
Cure time and cure conditions: defined and checked.
-
Bead size and placement: controlled so it does not block acoustic paths.
| Application point | Best compound type | Why | Watch-outs |
|---|---|---|---|
| Membrane bonding | Neutral-cure RTV silicone | Flexible, stable in weather | Control bead edge to avoid acoustic blockage |
| Housing seam assist | RTV silicone or hybrid sealant | Adds secondary barrier | Do not rely on sealant alone for IP |
| Cord entry water block | PU potting or controlled RTV | Stops wicking, adds strain support | Plan service strategy and rework method |
| PCB protection | PU or silicone conformal approach | Moisture protection with flexibility | Avoid trapping moisture during assembly |
| “Hard lock” areas | Epoxy (only when needed) | Maximum rigidity | Thermal stress, no easy rework |
A handset sealing spec is strongest when it describes the purpose of each compound and the acceptance checks after cure. That keeps manufacturing consistent and keeps field failures low.
Conclusion
Seal the handset with layered barriers: capsule gaskets, protected cord entry, controlled venting, and flexible potting compounds 9. Then validate with IP spray and dust tests on full assemblies 10.
Footnotes
-
Specialized communication devices built to withstand environmental elements like rain and dust. [↩] ↩
-
An instrument designed to generate, transmit, or receive sound waves. [↩] ↩
-
The movement of water within the spaces of a porous material due to adhesion. [↩] ↩
-
A protective layer that blocks water ingress while allowing sound transmission. [↩] ↩
-
Custom-shaped elastomeric seals designed to fit precise geometries for superior sealing. [↩] ↩
-
A coiled cable capable of extending and retracting, commonly used in handsets. [↩] ↩
-
A device used to attach and secure the end of a cable to equipment. [↩] ↩
-
A mechanism to protect the cord connection from stress and mechanical damage. [↩] ↩
-
Liquid resins used to fill and seal electronic assemblies for environmental protection. [↩] ↩
-
Ingress Protection ratings indicating high resistance to dust and water immersion. [↩] ↩