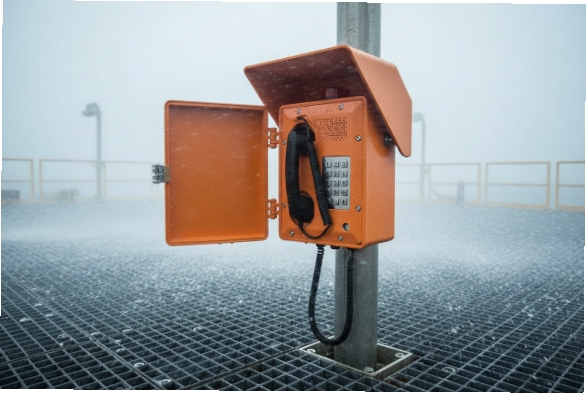
Phones drop or sound dead. The fix may start outside, at the demarc you can open safely: the NID.
A NID is the carrier demarcation. It terminates the telco loop, protects the entrance, and offers a test jack that cleanly isolates your inside wiring from the provider’s plant.

The network interface device (NID) 1 is not a VoIP box. It carries legacy analog Plain Old Telephone Service (POTS) 2 signals and defines who owns which side of the fault. That clarity helps when migrating to SIP, backfeeding house jacks from an ATA, or troubleshooting dial tone before the PBX.
How does a NID separate carrier demarc from my building network?
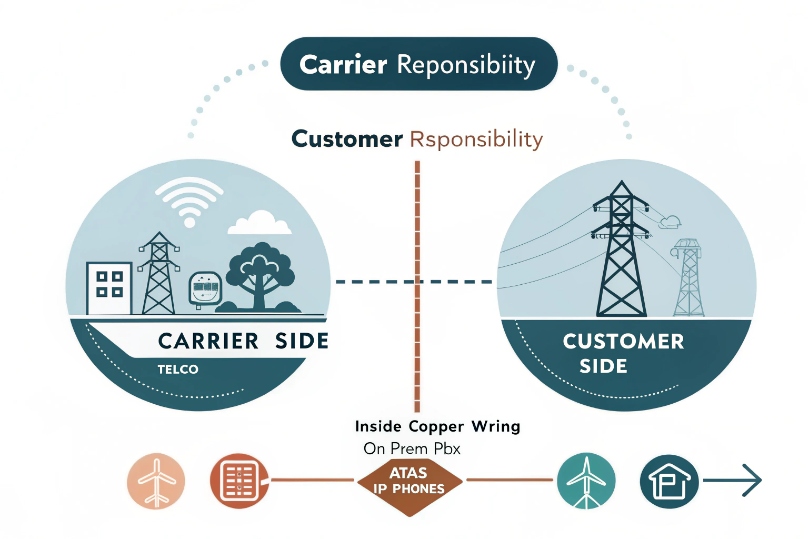
Trouble has two halves: the carrier side and the customer side. The NID draws the line and gives a safe, simple way to split them.
The NID contains a customer-accessible test jack that disconnects your premise wiring when used. Plug a known-good phone into it to check service right at the demarc.
Dive deeper Paragraph:
What the NID actually does
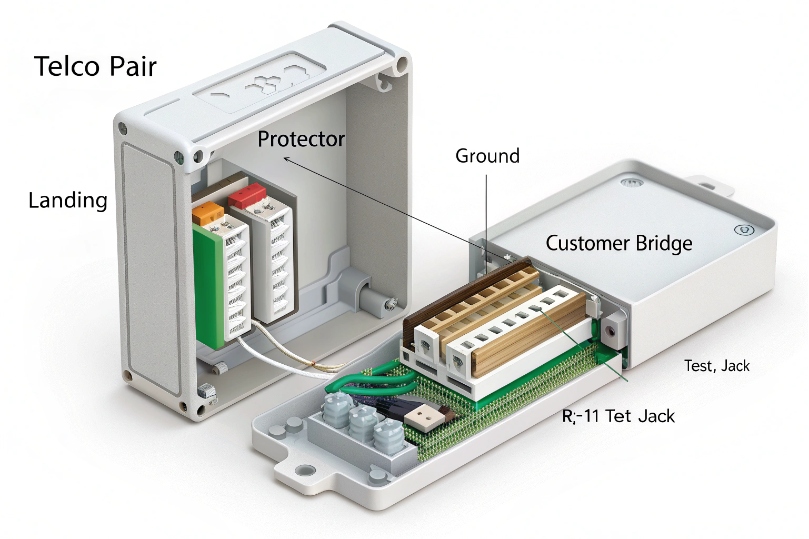
A typical copper NID sits on the exterior wall at the point of entry. The incoming telco pair lands on a primary protector. This module provides surge and lightning protection and a path to the building ground. From there, the pair passes through a hinged customer bridge with a modular RJ-11/12 test jack 3. When the bridge is plugged in, your inside wiring is connected to the telco pair. When you unplug that bridge (or flip the lever, depending on model), your inside wiring is disconnected, and the test jack now exposes the raw telco dial tone. This is the clean demarcation between provider responsibility and your responsibility.
What the NID does not do
It does not speak Session Initiation Protocol (SIP) 4. It does not manage QoS. It does not route IP. Even if your internet comes from the same provider, the NID for POTS is separate from your broadband CPE. In fiber deployments, you might see an ONT (optical network terminal) 5 inside and a fiber handoff outside; the ONT is the device that converts optical to copper Ethernet or analog voice FXS, while the NID remains the legal demarc for copper loops. In cable deployments, the cable modem handles IP; the NID for legacy voice, if present, still only handles analog pairs.
Why the separation matters for VoIP migrations
During a phased cutover, you might keep POTS lines for alarms, elevators, or failover while moving user handsets to SIP. The NID lets you prove the POTS side is healthy before you hand it to a gateway or abandon it. It also ensures you do not backfeed your ATA into the public network by mistake. The demarc is the gate: inside is your plant, outside is theirs.
| Side of NID | Owned by | Carries | Typical devices |
|---|---|---|---|
| Network side | Carrier | POTS loop voltage, ring, signaling | Outside plant, protector |
| Customer side | You | Inside wiring, analog extensions | IW pairs, PBX CO ports, ATAs |
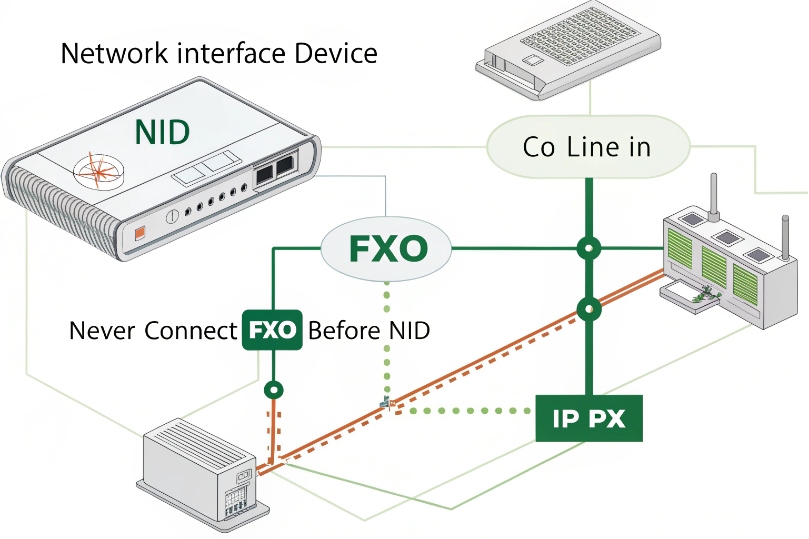
Where do I connect my FXO gateway—before or after the NID?
Never before. Always after. The FXO gateway emulates a central office line. It must see dial tone from the carrier side through the demarc, or a clean pair you own on the customer side.
Connect the gateway’s FXO port to the customer side of the NID or to the same inside pair the NID feeds.
Dive deeper Paragraph:
Correct placement for FXO and FXS
- FXO (Foreign eXchange Office) ports expect to receive POTS loop voltage and ring signaling 6 from the carrier. So the FXO port connects to the inside of the NID (customer side). From the gateway’s point of view, the NID looks like the “CO.”
- FXS (Foreign eXchange Station) ports, like those on an ATA that generate dial tone, feed your telephones or PBX station ports. FXS never connects to the network side of a NID. Doing so risks feeding your equipment voltage into the public network and can cause damage or safety issues.
Backfeeding a building from an ATA
If you plan whole-building VoIP via ATA backfeed, first isolate the inside wiring at the NID by unplugging the customer bridge. This severs the link to the carrier loop and prevents mixing voltages. Then connect the ATA’s FXS port to a jack tied to your premise distribution. Label the NID with a tag that says “HOUSE WIRING ISOLATED / VOIP BACKFEED” so future techs do not reconnect it by habit.
Common FXO wiring mistakes and symptoms
- FXO placed on the network side: The gateway seems to work but draws power across a protector not intended for customer gear. It may fail during surges or ring detection may be erratic.
- FXS tied into live telco feed: Phones ring strangely, gear overheats, and lightning protectors may trigger. This is unsafe.
- Polarity issues: Most modern gateways are polarity-agnostic, but reversed pairs can still confuse some legacy PBX cards. If caller ID fails or rings misbehave, check polarity at the jack.
Quick reference
| Task | Correct connection | Never do this |
|---|---|---|
| FXO to POTS | After NID, customer side | Before NID, network side |
| FXS to house jacks | After isolating at NID | Into live telco pair |
| SIP trunk handoff | Ethernet to SBC/PBX | Through NID (not applicable) |
Do I need a NID when migrating analog lines to SIP trunks?
You still need the demarc, but you may stop using the copper NID for everyday calling once you go all-SIP. The NID continues to mark where carrier copper ends and your wiring begins.
If analog lines are retired, the NID becomes a historical entry point or a landing for any remaining POTS circuits like alarms or elevators.

Dive deeper Paragraph:
Three common migration patterns
- Full cutover to SIP trunks: All external calling moves to SIP via your SBC or hosted provider. Phones are IP. The copper pairs at the NID are disconnected or left idle. The NID stays on the wall as a legal demarc and surge protective boundary for any remaining copper (often none).
- Hybrid period: Some analog lines remain for fax, alarms, emergency phones, or lift lines. Your PBX uses a mix of SIP trunks and FXO gateways. In this case, keep the NID in service for those POTS lines and route them to the FXO ports.
- Analog overlay with ATA backfeed: Internet-only sites feed analog handsets from an ATA. The NID’s inside wiring is used, but the carrier loop is isolated. The NID provides the safe isolation point.
Why you might still want one analog line
Even with SIP trunks, a copper POTS or cellular backup can offer out-of-band voice during complete IP outages. For regulated uses (fire alarm, elevator, emergency phones), local codes may still require analog or specific reliability guarantees. In those cases, the NID remains active for those circuits, or a cellular “POTS replacement” device stands in with its own protected demarc.
Operational notes during and after migration
- Labeling: Mark every pair at the NID and on the MDF/66/110 blocks with its purpose: “FXO to PBX CO1,” “Alarm line,” or “Isolated for ATA backfeed.”
- Grounding: Keep the NID protector properly bonded to the building ground even if you no longer use the pair. Good bonding reduces surge risks to your inside plant.
- SIP readiness: Move your “demarc thinking” from the NID to the SBC or edge router. That device is now the functional voice demarc for SIP trunks. Document public IPs, NAT, QoS, and media port ranges there.
| Migration state | Role of NID | What to document |
|---|---|---|
| All SIP | Passive demarc, protector remains | Label as retired; keep grounded |
| Hybrid | Active for remaining POTS | Pair maps to FXO ports |
| ATA backfeed | Isolation point only | Tag “telco feed disconnected” |
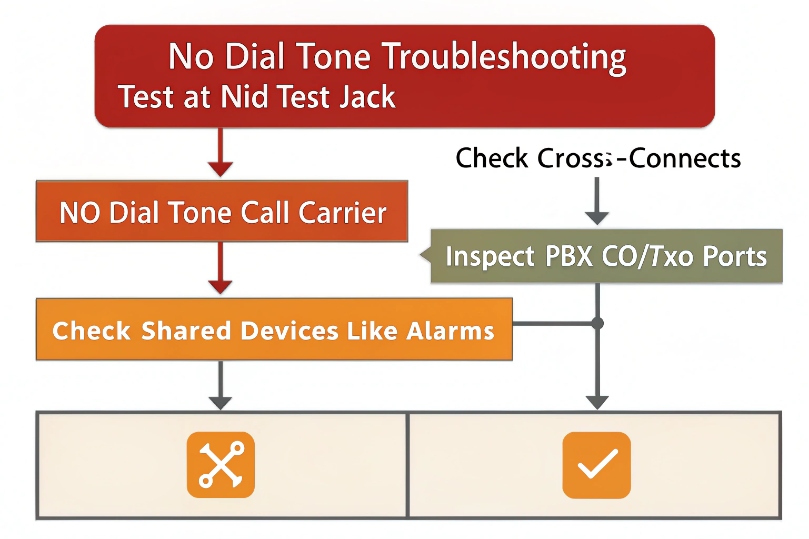
How do I troubleshoot no dial tone at the NID before the PBX?
Start at the demarc. Split the problem in half. If there is no dial tone at the NID test jack, call the carrier. If dial tone exists there but not at your PBX, the fault is inside.
Use a known-good analog test phone, a butt set, or a simple analog handset for verification.
Dive deeper Paragraph:
Safety and prep
- Treat the pair as live. On-hook DC is typically ~48V. Telephone line voltages 7 can include ring signals around ~90VAC at ~20 Hz. Do not touch bare conductors.
- Wear eye protection. Surges can arc at protectors.
- Work only in the customer access side of the NID. Do not open sealed telco compartments.
Step-by-step isolation
- Identify the line: Note the label for Line 1, Line 2, etc.
- Open the customer bridge: Flip the hinged plug or pull the modular connector to isolate inside wiring.
- Test at the demarc: Plug a known-good telephone into the test jack.
- Hear dial tone? The carrier feed is good. The inside wiring or PBX is at fault.
- No dial tone? Fault lies on the carrier side. Open a ticket with the provider.
- Call out and call in: If dial tone exists, place an outgoing call and ask someone to call the number back. Confirm ringing and caller ID.
- Measure voltage (optional): With a safe telecom voltmeter, check on-hook (~48V DC) and off-hook (~6–12V DC). No voltage means open pair. Low or unstable voltage indicates a short or partial short.
- Reconnect bridge: If the demarc test passes, reconnect the bridge and move to the next test point inside (MDF, 66/110 block, PBX CO port).
Inside wiring and PBX checks
- Cables and pairs: Trace the pair from the NID to your frame. Tone-and-probe if unlabeled.
- Cross-connects: On 66/110 blocks, verify the correct pair lands on the PBX CO/FXO port, not an FXS or station port.
- PBX/FXO port state: Some gateways need configuration to go off-hook and seize the line. Check impedance, polarity (rarely an issue today), and caller ID standards (Bellcore FSK vs ETSI).
- Surge protectors: Inline protectors can fail “short.” Bypass temporarily to test (only for brief diagnostics).
- Alarms and modems: Shared devices can grab the line and hold it off-hook. Disconnect them and retest.
Quick decision table
| NID test result | Next action | Likely fix |
|---|---|---|
| No dial tone at test jack | Open carrier ticket | Outside plant repair |
| Dial tone at test jack, none at PBX | Inspect inside wiring | Re-terminate pair, fix cross-connect |
| Dial tone intermittent | Check protectors/grounding | Replace failed module, bond ground |
| Ring present, caller ID missing | Check FXO/CO config | Set correct CID standard |
Conclusion
The NID is the clean line between carrier and building. Connect FXO after it, isolate it for ATA backfeed, and keep it for POTS needs during SIP migration. Test at the demarc first, then move inward.
Footnotes
-
Overview of NIDs and how demarcation/test jacks isolate carrier vs customer wiring. ↩ ↩
-
Explains what POTS is and why analog lines still appear in VoIP migrations. ↩ ↩
-
Clarifies RJ-11/RJ-12 connector standards used for NID test access. ↩ ↩
-
Authoritative SIP spec used by PBXs, phones, and carriers. ↩ ↩
-
Shows what an ONT does in fiber installs and how it hands off voice/data. ↩ ↩
-
Helps distinguish FXO/FXS interfaces when bridging analog lines into VoIP gateways. ↩ ↩
-
Quick reference for typical telephone line DC and ringing voltages for safe handling. ↩ ↩