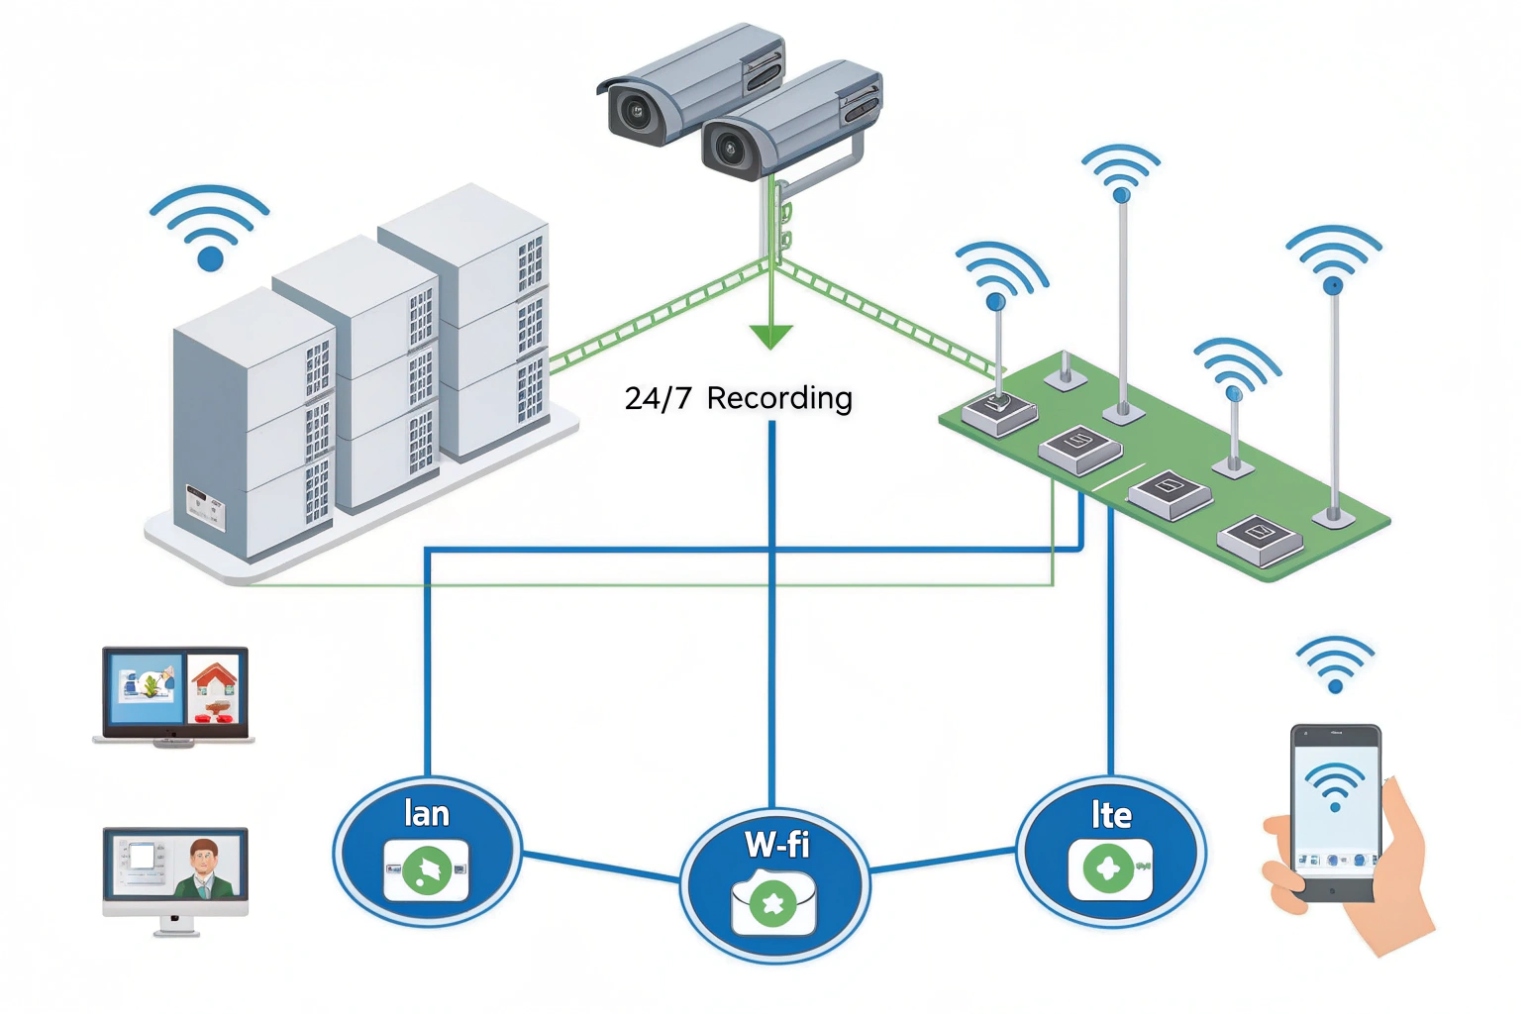
When a project scales from 2 cameras to 64, the network starts to choke. Video turns laggy, operators complain, and storage runs out faster than planned.
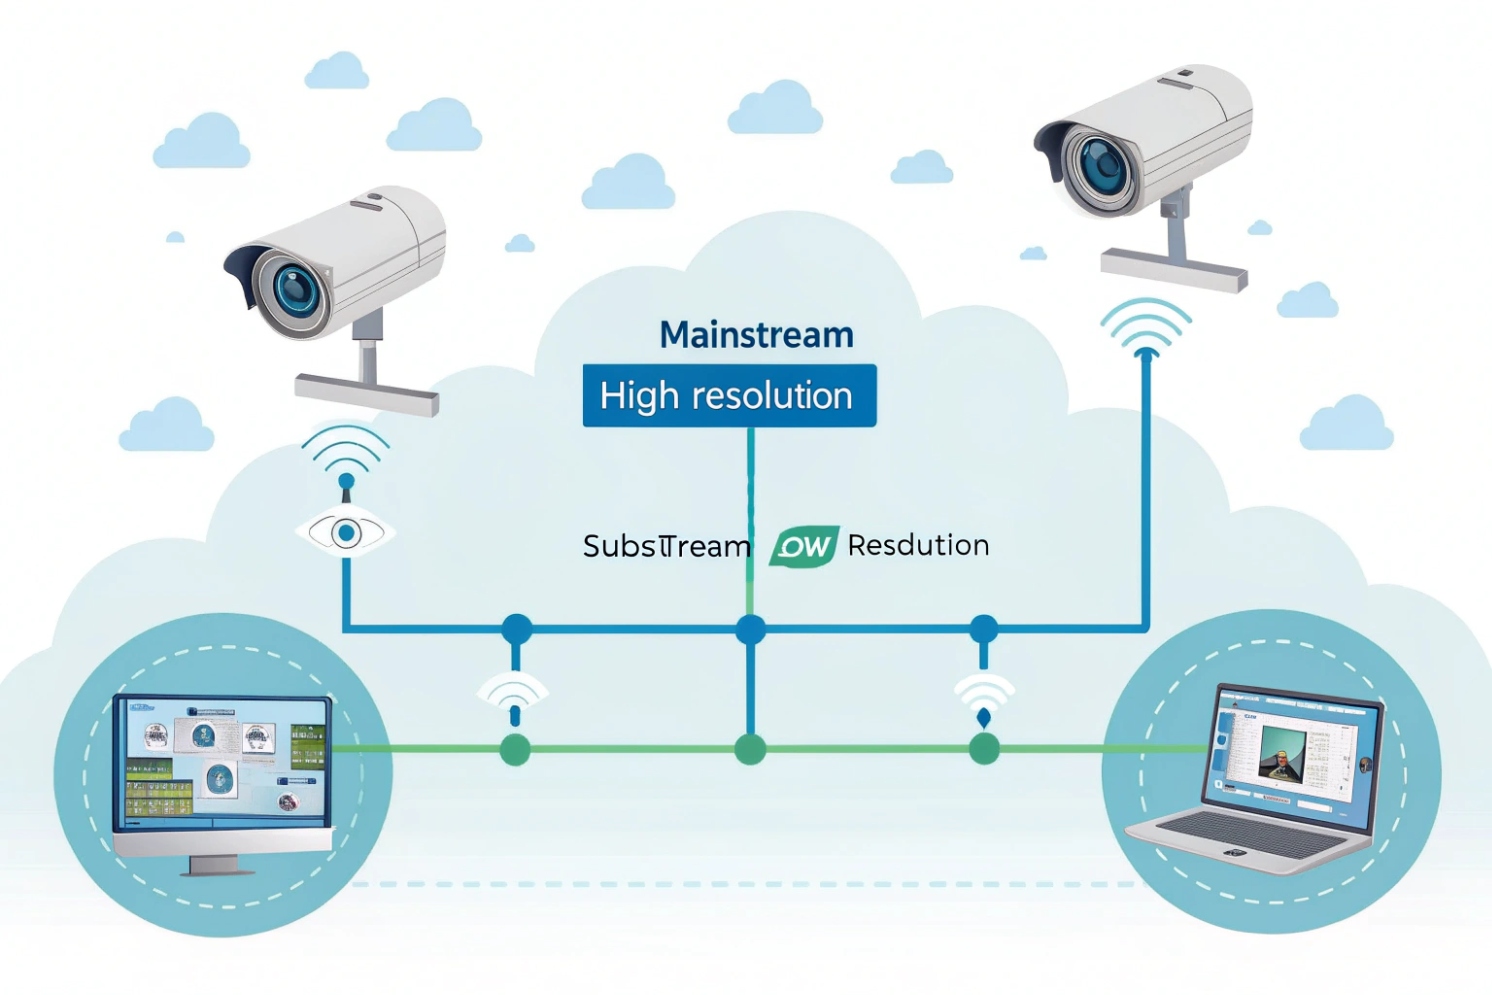
Mainstream is the primary high-quality stream for detail and evidence. Substream is a secondary lighter stream for smooth preview and remote viewing. Both run at the same time, but with different resolution, bitrate, and FPS.

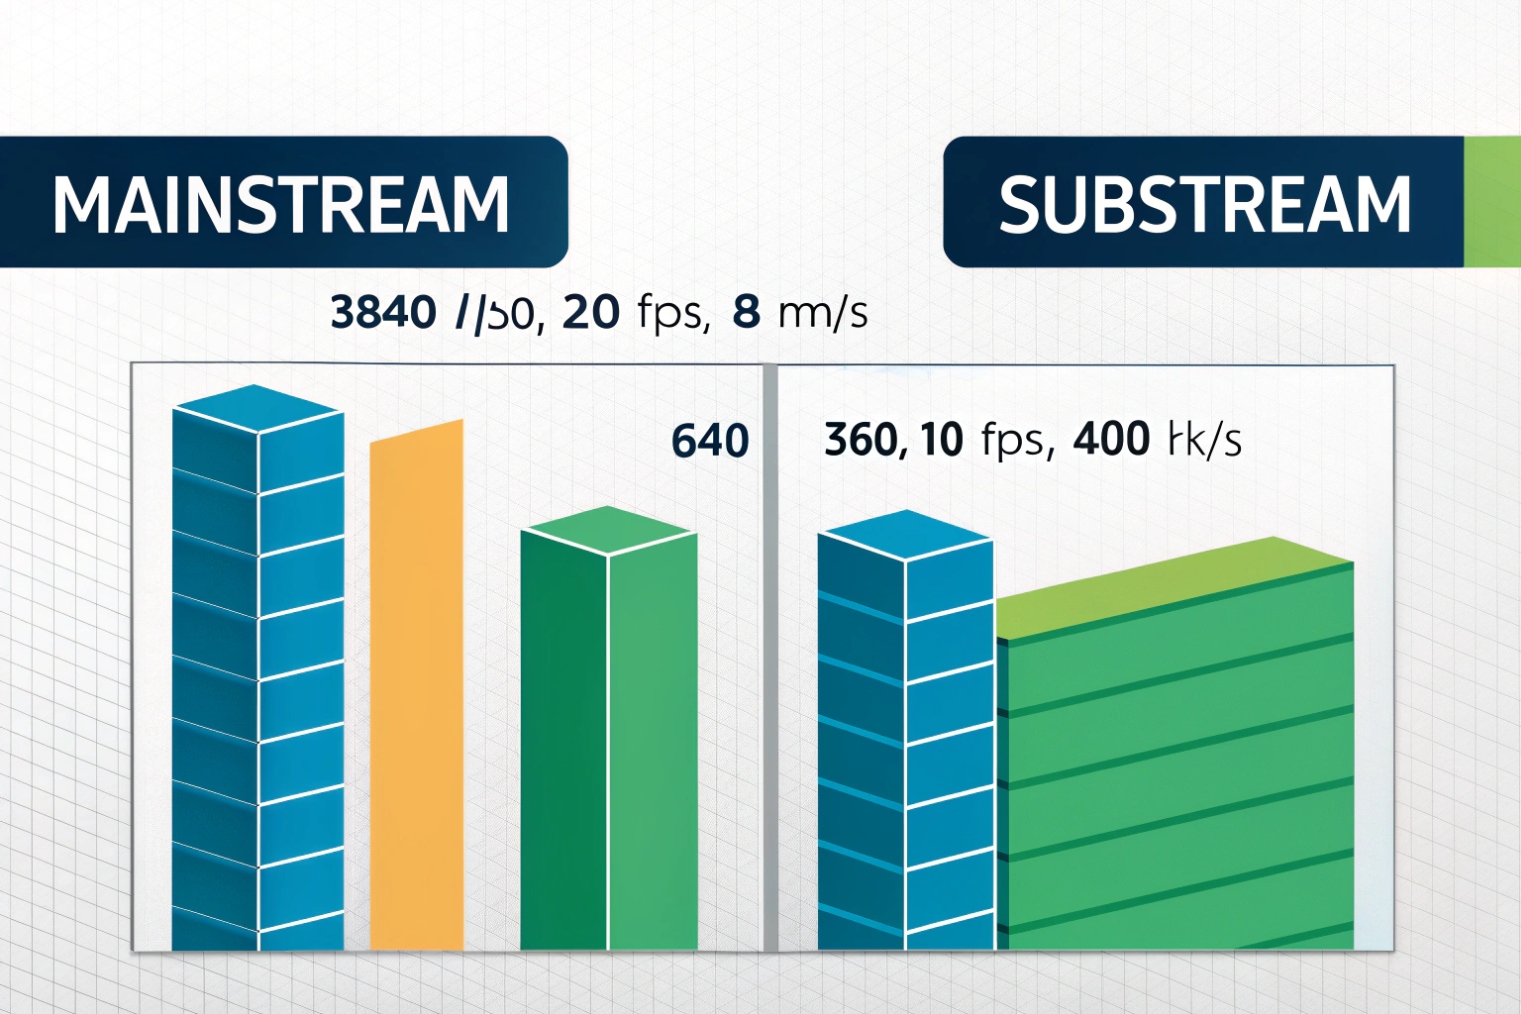
Mainstream vs substream: the practical difference that matters on real networks
Mainstream is your “evidence” stream
Mainstream is the camera’s primary encoder output. It is usually the highest resolution, highest bitrate, and often the highest frame rate. This is the stream that keeps license plates readable, faces clearer, and motion less blurry. In most deployments, mainstream is what an NVR records 24/7 or on motion. If storage is tight, mainstream is still the right choice for key cameras like entrances, cash points, elevators, and perimeter zones.
For a vendor-style definition of the two-stream concept, see main stream and sub stream 1.
{#fnref1}
Substream is your “operations” stream
Substream is a second encoder output that is intentionally smaller. It uses a lower resolution and lower bitrate so it loads quickly on phones, indoor monitors, and multi-camera grids. On a 16-up or 36-up view, decoding 36 mainstream feeds can overload a client PC or a mobile device. Substream prevents that without changing what the NVR records. It also reduces uplink usage when viewing offsite.
Two streams, two sets of knobs
The core point is control. Each stream usually has independent settings: codec (H.264/H.265), resolution, FPS, bitrate mode (CBR/VBR), and keyframe interval. That independence lets a system stay sharp in recordings while staying smooth in live monitoring.
| Item | Mainstream (typical) | Substream (typical) | Why it matters |
|---|---|---|---|
| Resolution | 1080p / 4MP / 4K | D1 / 640×360 / 720p | Preview speed vs evidence detail |
| Bitrate | Higher (Mbps range) | Lower (hundreds of Kbps) | Network and storage load |
| FPS | 15–30 | 6–15 | Smoothness vs decoding cost |
| Codec | H.265 or H.264 | Often H.264 for compatibility | Older clients struggle with H.265 |
| Use case | Recording, playback, forensic zoom | Multi-view, mobile preview, weak uplinks | Keeps systems usable at scale |
Hidden trade-offs people forget
Substream can come with limits. Some cameras do not include audio on substream. Some analytics features run only on mainstream. Some cameras cap substream FPS or force a fixed GOP. These are not “bad” designs, but they change how you plan the system. In practice, it helps to decide which stream is used for which workflow, then lock the settings and document them per site.
If mainstream and substream are understood early, later problems become easier. Most “lag” complaints are not camera failures. They are stream selection problems.
A simple next step is deciding which stream to use for NVR recording and which stream to use for daily preview.
The rest of this guide breaks that into clear rules and settings that work in real deployments.
Which stream should I use for NVR recording vs preview?
When an operator says “video is slow,” the first fix is often not bandwidth. It is choosing the right stream for the right screen.
Use mainstream for NVR recording and single-camera playback. Use substream for multi-camera preview grids and remote viewing. Many VMS clients auto-switch streams when you open a camera full-screen.
Recording: prioritize detail, not comfort
For recording, mainstream is usually the correct default. Recordings exist for investigation, not for smooth daily viewing. If a site needs evidence quality, reducing mainstream too far creates permanent loss of detail that cannot be recovered later. The better approach is to record mainstream at a sensible bitrate and FPS, then use substream for live monitoring. This keeps storage predictable while keeping the operator experience fast.
For key scenes, set mainstream to the real target resolution of the project. For example, a 4MP camera should record 4MP if that detail is required. If not, lowering to 1080p can be a smart storage choice, but that is a business decision, not a “performance” fix.
Preview: protect the operator and the network
Preview is where substream shines. A grid view multiplies the load. Eight cameras is already heavy on a weak PC if all are mainstream. Sixteen cameras can break a laptop quickly. Substream makes grids smooth, reduces decoding demand, and saves uplink bandwidth for remote access.
Many NVRs and VMS platforms do a smart trick: they show substream in multi-view, then switch to mainstream when a camera is opened full-screen or when digital zoom is used. This behavior is ideal, but it only works well if both streams are configured cleanly and the codec is compatible with the client.
A clean, repeatable policy
A policy prevents “random settings per installer.” In projects, a simple rule set keeps support tickets low.
| Workflow | Recommended stream | Why |
|---|---|---|
| 24/7 recording on NVR | Mainstream | Best evidence and playback detail |
| Motion-based recording | Mainstream (or mixed by camera importance) | Keeps key events sharp |
| Multi-camera live grid | Substream | Smooth viewing and low decode load |
| Mobile remote preview | Substream | Works on low uplinks and weak CPUs |
| Full-screen live view | Mainstream (auto-switch) | Supports zoom and clarity |
Extra tip: record substream only when it has a reason
Recording substream in parallel can help in two cases. First, it provides “continuity” if the WAN link drops and the system records a lower feed at a remote site. Second, it extends retention for low-importance cameras. Still, it should be a deliberate choice. Recording substream instead of mainstream is often a false economy if the footage is ever needed for investigation.
Once stream roles are clear, the next question becomes the settings that create the quality difference: resolution, bitrate, and FPS.
How do resolution, bitrate, and FPS differ between streams?
Most camera menus show two stream rows, then a long list of settings. Without a model, it turns into guessing and endless retesting.
Mainstream usually runs higher resolution, higher bitrate, and often higher FPS. Substream runs lower resolution, lower bitrate, and moderate FPS to reduce bandwidth and decoding load while staying smooth.
Resolution sets the detail ceiling
Resolution is the pixel grid. It defines the maximum detail the stream can carry. If the camera is 4MP but the stream is set to 720p, the extra sensor detail is not used. For mainstream, resolution is chosen based on the scene goal: face detail, plate detail, or general coverage. For substream, resolution is chosen based on preview practicality: fast loading and easy decoding.
A common mistake is setting substream too low. If substream is blurry, operators zoom in and force mainstream more often, which defeats the purpose. A better substream keeps enough clarity for basic situational awareness.
Bitrate controls quality and network cost
Bitrate is the budget. Too low creates blocky motion and smeared faces. Too high wastes storage and can trigger congestion and packet loss, especially on Wi-Fi or shared WAN links. Mainstream bitrate should match resolution and scene motion. Substream bitrate should match grid viewing and remote constraints.
Codec choice changes bitrate needs. H.265 can reduce bitrate for the same quality, but compatibility may drop on older NVRs, indoor stations, and mobile clients. That is why many installers keep substream on H.264 even when mainstream uses H.265.
If you need a quick refresher on bitrate modes used in camera menus, see CBR vs VBR bitrate modes 2.
{#fnref2}
FPS controls motion smoothness and blur
FPS (frame rate) is the motion sampling rate. Higher FPS improves motion clarity but increases bitrate and CPU decode load. For mainstream recording, 15–25 FPS is common for general surveillance. For substream, 6–15 FPS is often enough for preview.
A practical baseline matrix
These are starting points that work in many commercial projects. They should be tuned based on scene motion and bandwidth.
| Stream | Resolution example | FPS example | Bitrate example | When it works well |
|---|---|---|---|---|
| Mainstream (1080p) | 1920×1080 | 15–25 | 2–6 Mbps | Entrances, hallways, offices |
| Mainstream (4MP) | 2560×1440 | 15–20 | 4–8 Mbps | Parking, perimeter, wider scenes |
| Substream (preview) | 640×360 to 1280×720 | 8–15 | 256–800 Kbps | Grids, mobile, indoor stations |
| Substream (WAN) | 640×360 | 6–10 | 150–400 Kbps | Limited uplink sites |
Don’t ignore keyframe interval
Keyframe interval (GOP / I-frame interval) affects seeking and perceived smoothness. If the interval is too long, preview can feel laggy and scrubbing playback can be slow. A simple rule is to set the I-frame interval close to 1–2 seconds. For example, at 15 FPS, an interval of 15–30 frames is a good starting point. Keep it consistent across cameras to simplify troubleshooting.
Once the stream settings are stable, integration becomes the next issue. ONVIF and RTSP clients must select the right stream reliably.
How do ONVIF profiles select mainstream or substream?
Many teams assume ONVIF always connects to “mainstream.” Then a VMS shows low quality, and people blame the camera. The real reason is often the ONVIF media profile.
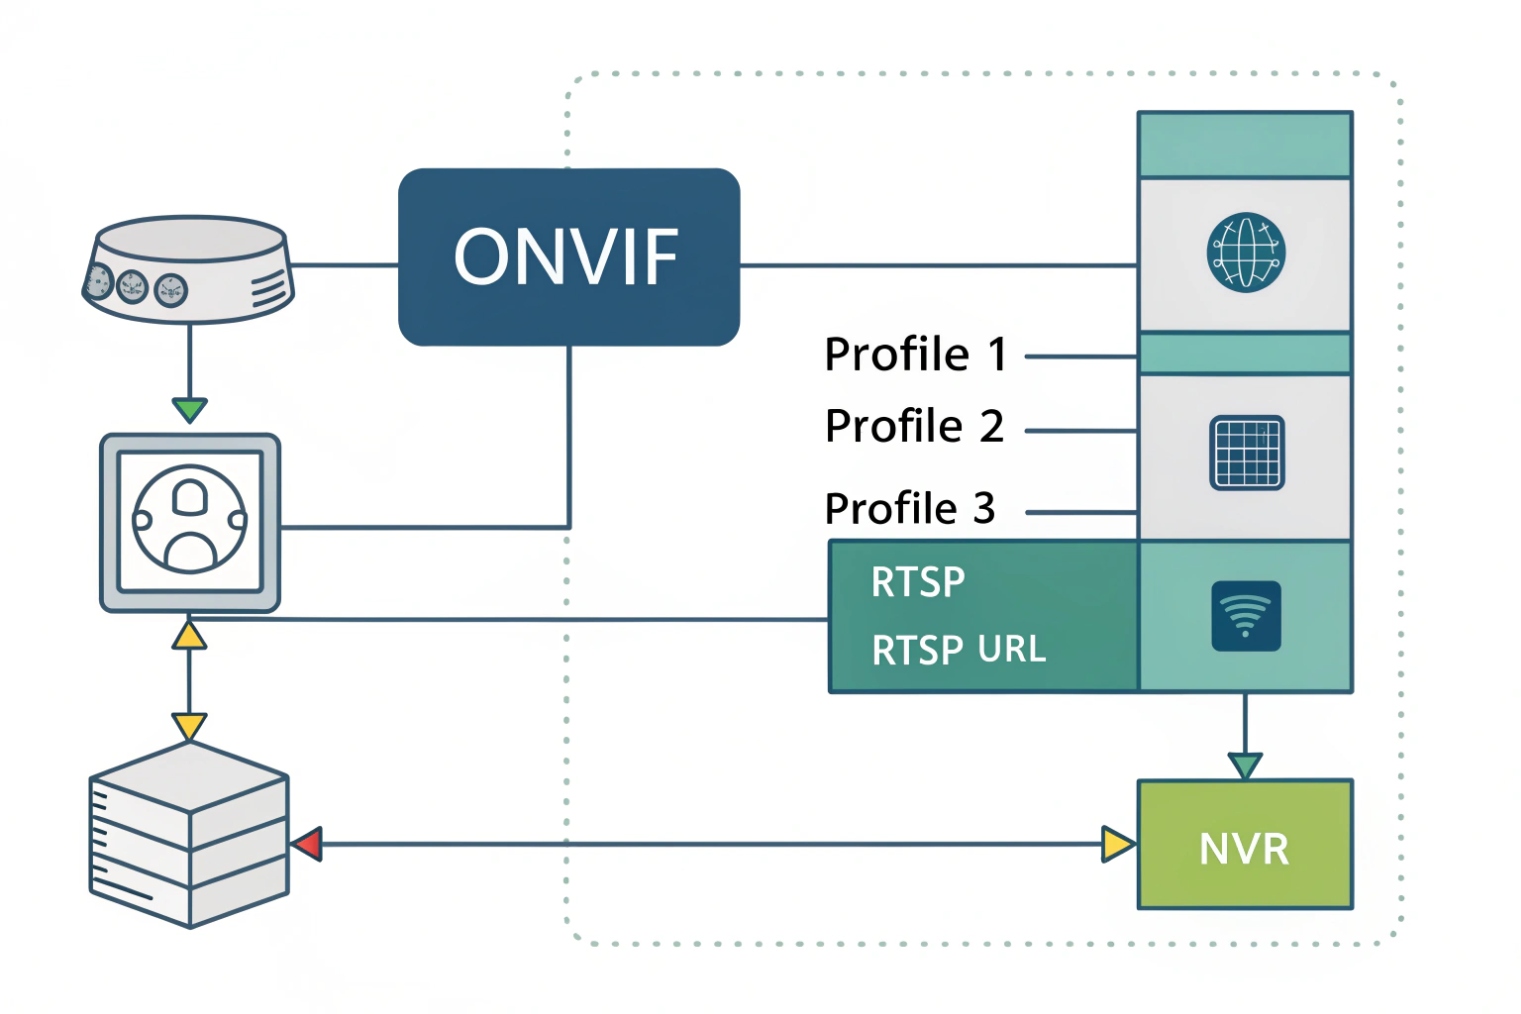
ONVIF clients select a stream by choosing a media profile, then requesting the stream URI for that profile. Cameras often expose separate profiles for high and low streams, but naming and mapping depend on the vendor.
ONVIF uses “profiles” as stream bundles
In ONVIF terms, a media profile is a bundle of settings: video encoder config, resolution, bitrate, FPS, and sometimes audio. A camera can expose multiple media profiles at the same time. Many cameras create a “high quality” profile and a “low quality” profile. Those often align with mainstream and substream, but the labels can be confusing.
If you want the official definition of what a profile contains, read the ONVIF media profile configuration 3.
{#fnref3}
Some cameras name them clearly, like “MainStream” and “SubStream.” Others use “Profile1” and “Profile2.” Some even expose multiple profiles per resolution or per codec. That is why the safest workflow is to check the profile details, not just the name.
How a VMS usually chooses
A VMS typically:
1) Gets the list of media profiles from the camera
2) Picks one based on rules (name match, first profile, highest resolution, or user selection)
3) Requests the RTSP URI tied to that profile
4) Starts pulling the stream
If the VMS default rule is “first profile,” and the camera lists substream first, the VMS will show substream. That looks like a camera quality issue, but it is actually a selection rule issue.
The ONVIF call that returns a streaming URL is typically GetStreamUri 4.
{#fnref4}
How to make selection predictable
To keep projects stable across different VMS brands:
- Rename ONVIF profiles if the camera supports it
- Put the mainstream profile first if the VMS uses “first profile”
- Ensure the mainstream profile includes audio if audio is required
- Ensure substream uses a compatible codec (often H.264) for preview apps
- Keep bitrate and FPS within the client’s decoding limits
| ONVIF behavior | What it can cause | Fix approach |
|---|---|---|
| Client chooses first profile | Unexpected low-quality preview | Reorder or rename profiles |
| Client chooses highest resolution | Heavy load on grid view | Force substream for multi-view |
| Profile lacks audio | Silent playback/preview | Enable audio in that profile |
| H.265 on substream | Old decoders fail or stutter | Use H.264 on substream |
| Multiple similar profiles | Confusing stream picks | Remove unused profiles, document tokens |
When ONVIF is not enough
Some systems do not let you pick a profile cleanly. In that case, RTSP URLs are often simpler. Many cameras expose separate RTSP paths for “stream 1” and “stream 2.” Using RTSP directly can remove ONVIF ambiguity, as long as credentials and firewall rules are handled properly.
If you need protocol-level background, start with Real Time Streaming Protocol (RTSP) 5.
{#fnref5}
After ONVIF selection is clear, the last step is configuring dual-stream for SIP intercom endpoints and RTSP, where compatibility and latency matter even more.
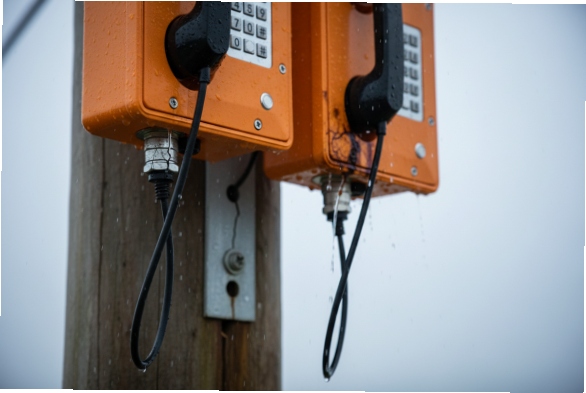
How do I set dual-stream for SIP intercoms and RTSP?
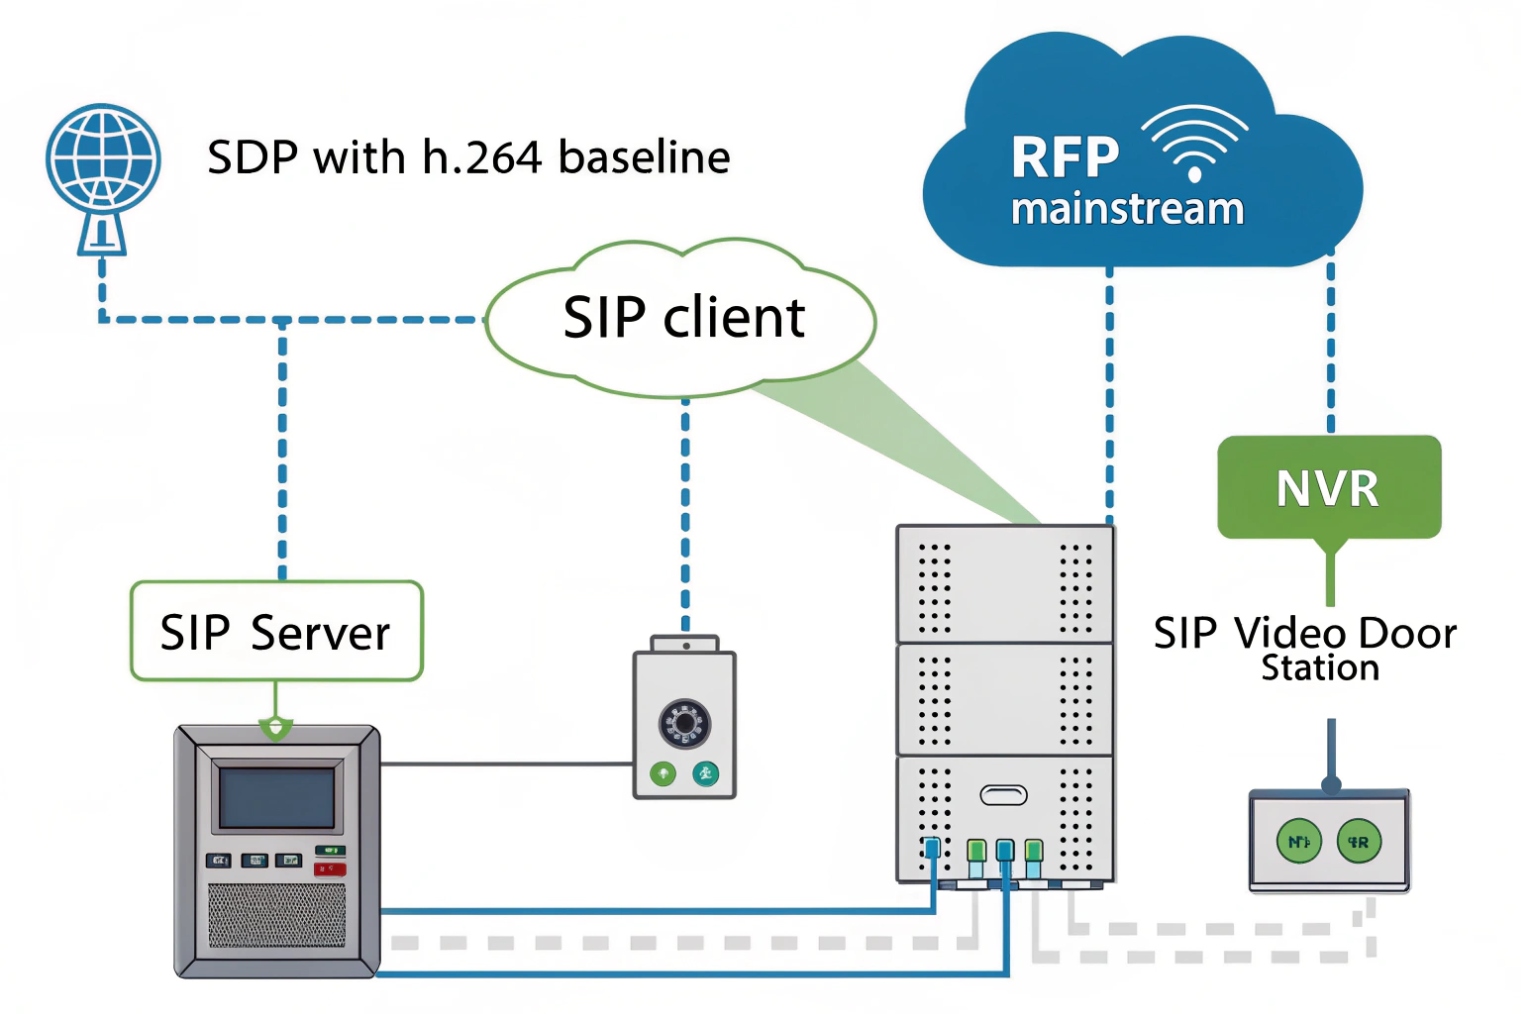
Video intercoms and door phones sit in a strange place. They behave like cameras, but they also behave like real-time calling devices. A wrong stream choice can add delay or break compatibility.
Set mainstream for NVR recording and forensic playback, and set substream for indoor station preview or remote apps. For SIP video calls, keep the calling stream conservative: H.264, moderate resolution, and stable FPS to protect latency and compatibility.
Step 1: define the “record” stream and the “view” stream
For a SIP intercom with an RTSP camera module, the clean layout is:
- Mainstream: high quality for NVR (RTSP/ONVIF)
- Substream: lighter feed for preview (VMS grid, indoor station live tile, mobile check-in)
This prevents the common trap where a wall monitor tries to decode a heavy mainstream feed and becomes laggy. It also keeps the NVR from recording a low-quality feed by mistake.
Step 2: keep substream compatible with older decoders
Many indoor stations and older VMS decoders handle H.264 better than H.265, especially when multiple streams are on screen. A practical pattern is:
- Mainstream: H.265 (if the recorder supports it) or H.264 High
- Substream: H.264 Baseline/Main, moderate profile, stable GOP
If you need authoritative references for what those codecs are, see H.264 (AVC) 6 and H.265 (HEVC) 7.
{#fnref6}
{#fnref7}
This avoids “black screen” issues in preview apps that do not support H.265 or certain H.264 profiles.
Step 3: tune packetization-like behavior for real-time feel
For intercom live view, the goal is lower end-to-end latency. That usually comes from:
- Lower resolution on substream
- Moderate FPS (10–15) to keep motion usable
- Shorter GOP (around 1–2 seconds) so the stream starts and seeks faster
- Reasonable bitrate so Wi-Fi and uplinks do not drop packets
Substream’s smaller frames can reduce encode time and reduce network queuing. This often makes “door conversation” feel more natural because the video arrives faster and more consistently.
Step 4: RTSP paths and selection without guessing
RTSP URL formats are vendor-specific, so the best practice is to confirm stream paths in the camera’s menu or documentation. Still, the pattern is usually “stream 1” for mainstream and “stream 2” for substream. Once those two URIs are known, configure:
- NVR recording to pull mainstream URI
- Indoor station preview to pull substream URI
- VMS grid to prefer substream and switch to mainstream on full-screen
| Endpoint | Stream choice | Suggested settings | Reason |
|---|---|---|---|
| NVR record | Mainstream | Higher res, stable bitrate, 15–25 FPS | Evidence quality |
| Indoor station tile | Substream | H.264, 640×360–720p, 10–15 FPS | Fast and compatible |
| Mobile remote preview | Substream | Lower bitrate, moderate FPS | Saves uplink data |
| SIP video call | Conservative stream | H.264, moderate res, short GOP | Keeps call stable |
| VMS full-screen | Mainstream | Highest needed detail | Zoom and clarity |
Step 5: avoid double-stream overload
A camera can serve multiple streams to multiple clients at the same time. That is useful, but it is not infinite. If many clients request mainstream at once, the camera CPU and uplink can become the bottleneck. In real sites, a good rule is to keep mainstream viewers limited and push daily preview to substream. This also reduces PoE switch load and avoids sudden bursts on the uplink.
For SIP intercom projects, this approach keeps the door experience smooth while keeping recorded evidence sharp. That balance is what makes a system feel professional, not just functional.
Conclusion
Mainstream is for detail and recording, substream is for smooth preview and remote access. Set both intentionally, and let ONVIF/RTSP clients select the right one for each workflow.
Footnotes
-
Clear vendor explanation of mainstream vs substream and how NVRs typically record the high stream. ↩ ↩
-
Quick guide to CBR vs VBR so camera bitrate mode choices are made intentionally. ↩ ↩
-
Official ONVIF definition of media profiles and how streams are bundled for client selection. ↩ ↩
-
Official ONVIF streaming spec explaining GetStreamUri and how clients retrieve stream URLs. ↩ ↩
-
Protocol reference for RTSP control, useful when using direct RTSP URLs instead of ONVIF. ↩ ↩
-
Authoritative standard reference for H.264, helpful when validating codec compatibility across clients and NVRs. ↩ ↩
-
Authoritative standard reference for H.265, helpful when planning bitrate savings vs decoder compatibility. ↩ ↩